# Guide to Creating and Configuring a Portal on FaceSign
***
#### Step 1: System Authentication
* The process starts on the platform's login screen **FaceSign**. The user can choose facial biometric authentication by clicking "**Face In**", or use the traditional method with email and password. After entering the credentials, access to the dashboard is granted by clicking the "**Enter**".
***
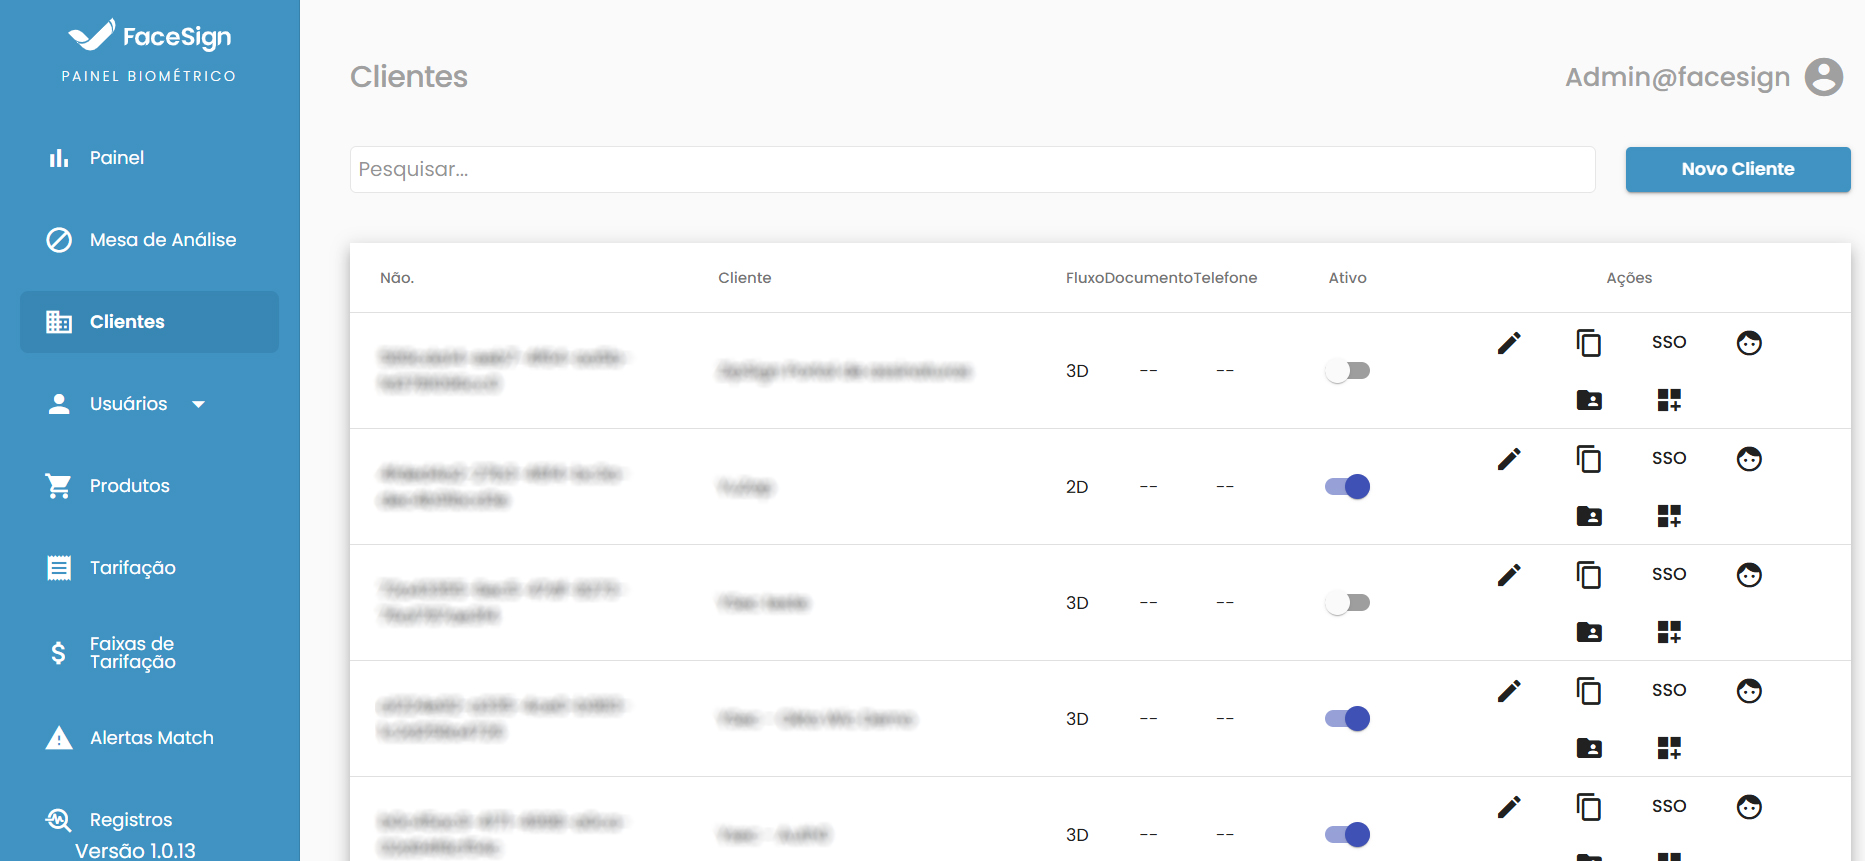
#### **Step 2: Accessing the Clients Area and Creation**
* After logging in, the user is directed to the biometric dashboard. In the left sidebar menu, select the option "**Clients**". To start the registration, click the "**New Client**" button, located in the top right corner of the screen. This action will open a form with seven configuration tabs for registering a new portal.
***
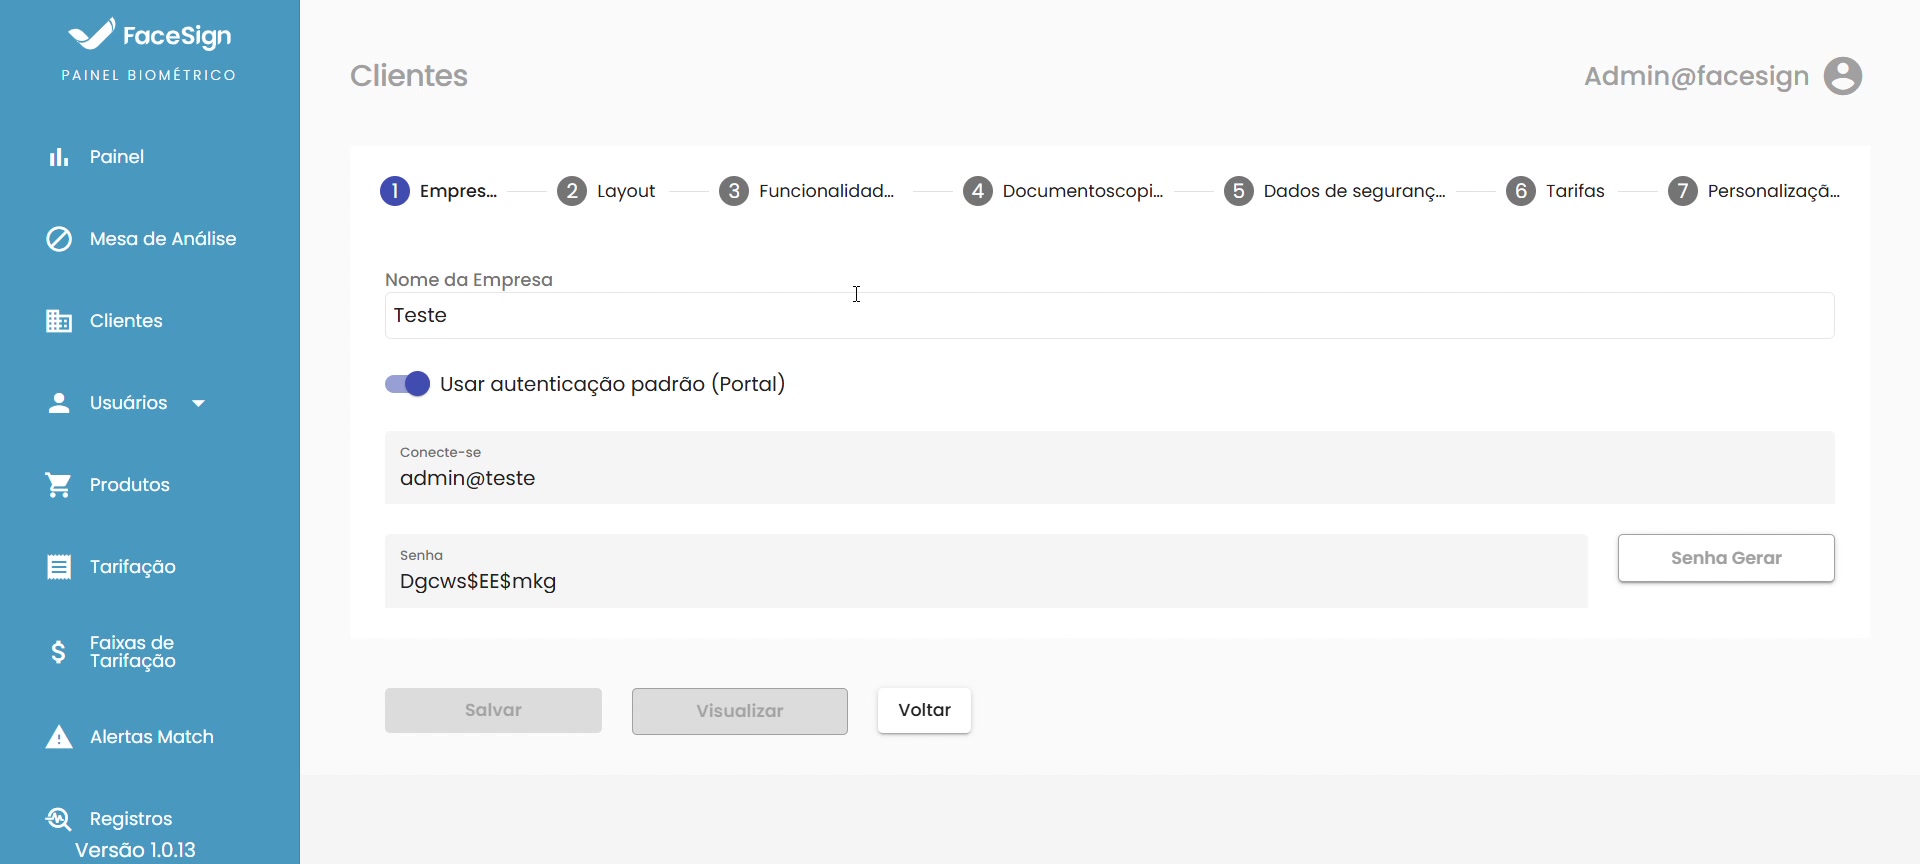
#### **Step 3:** Company Configuration and Authentication
* On the first tab, "**Company**", fill in the company name in the corresponding field. The system allows activating the "**default authentication (Portal)**", automatically generating a username and a secure password, which can be used for direct access to the client's portal.
***
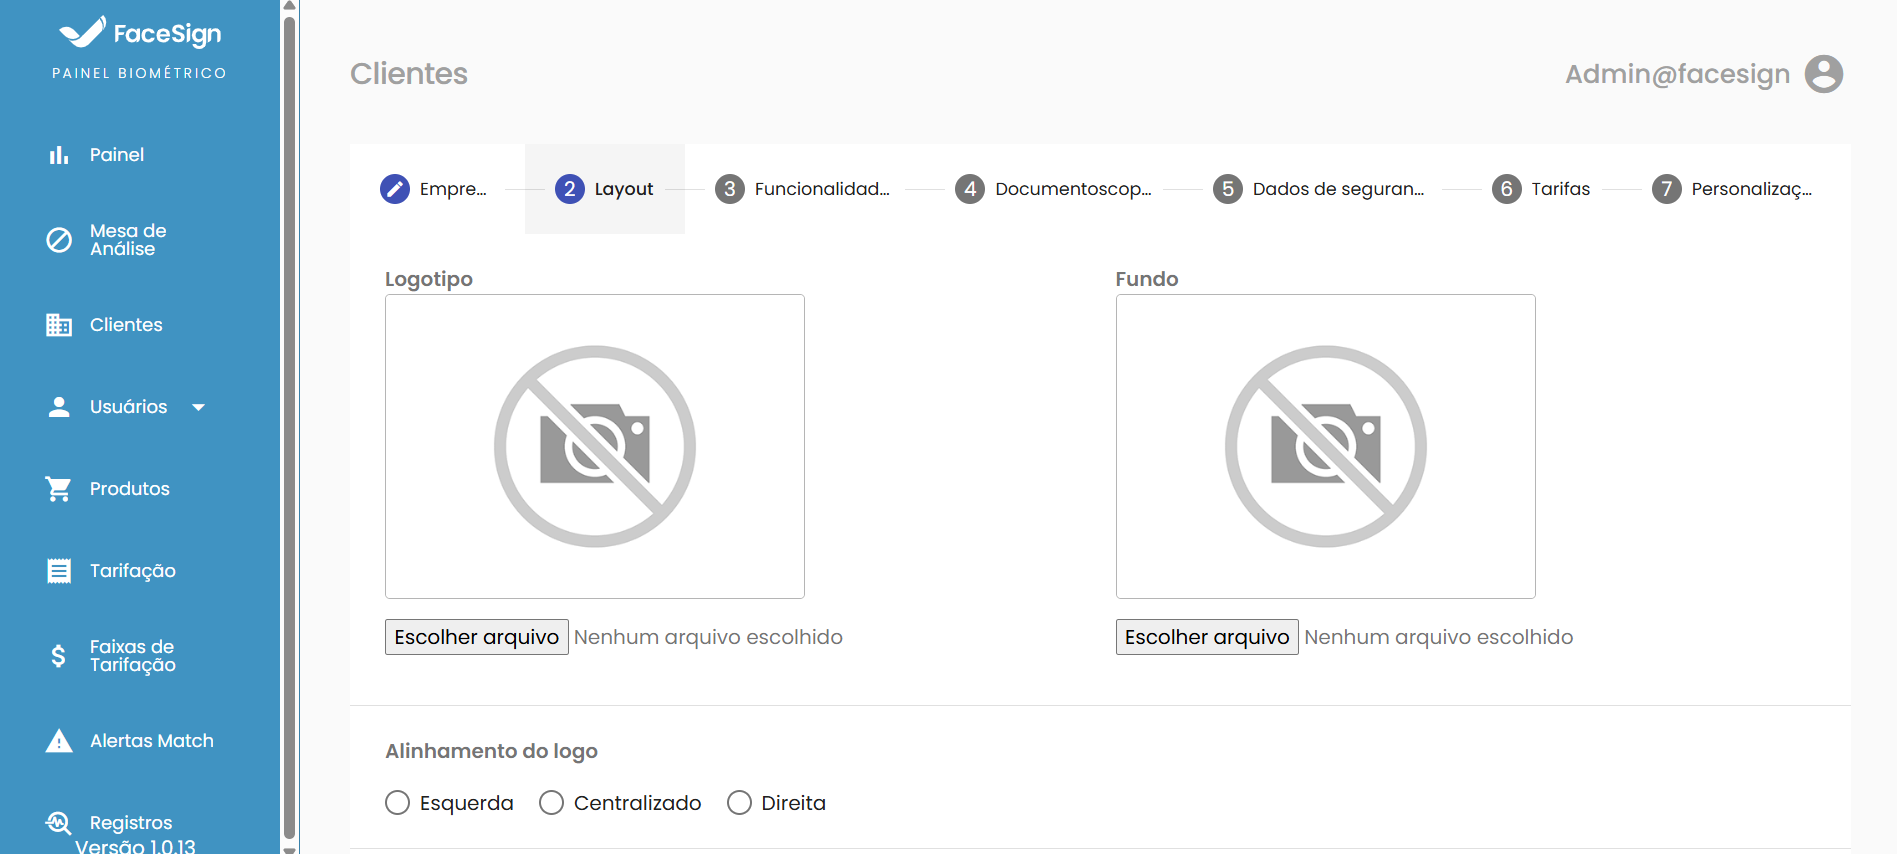
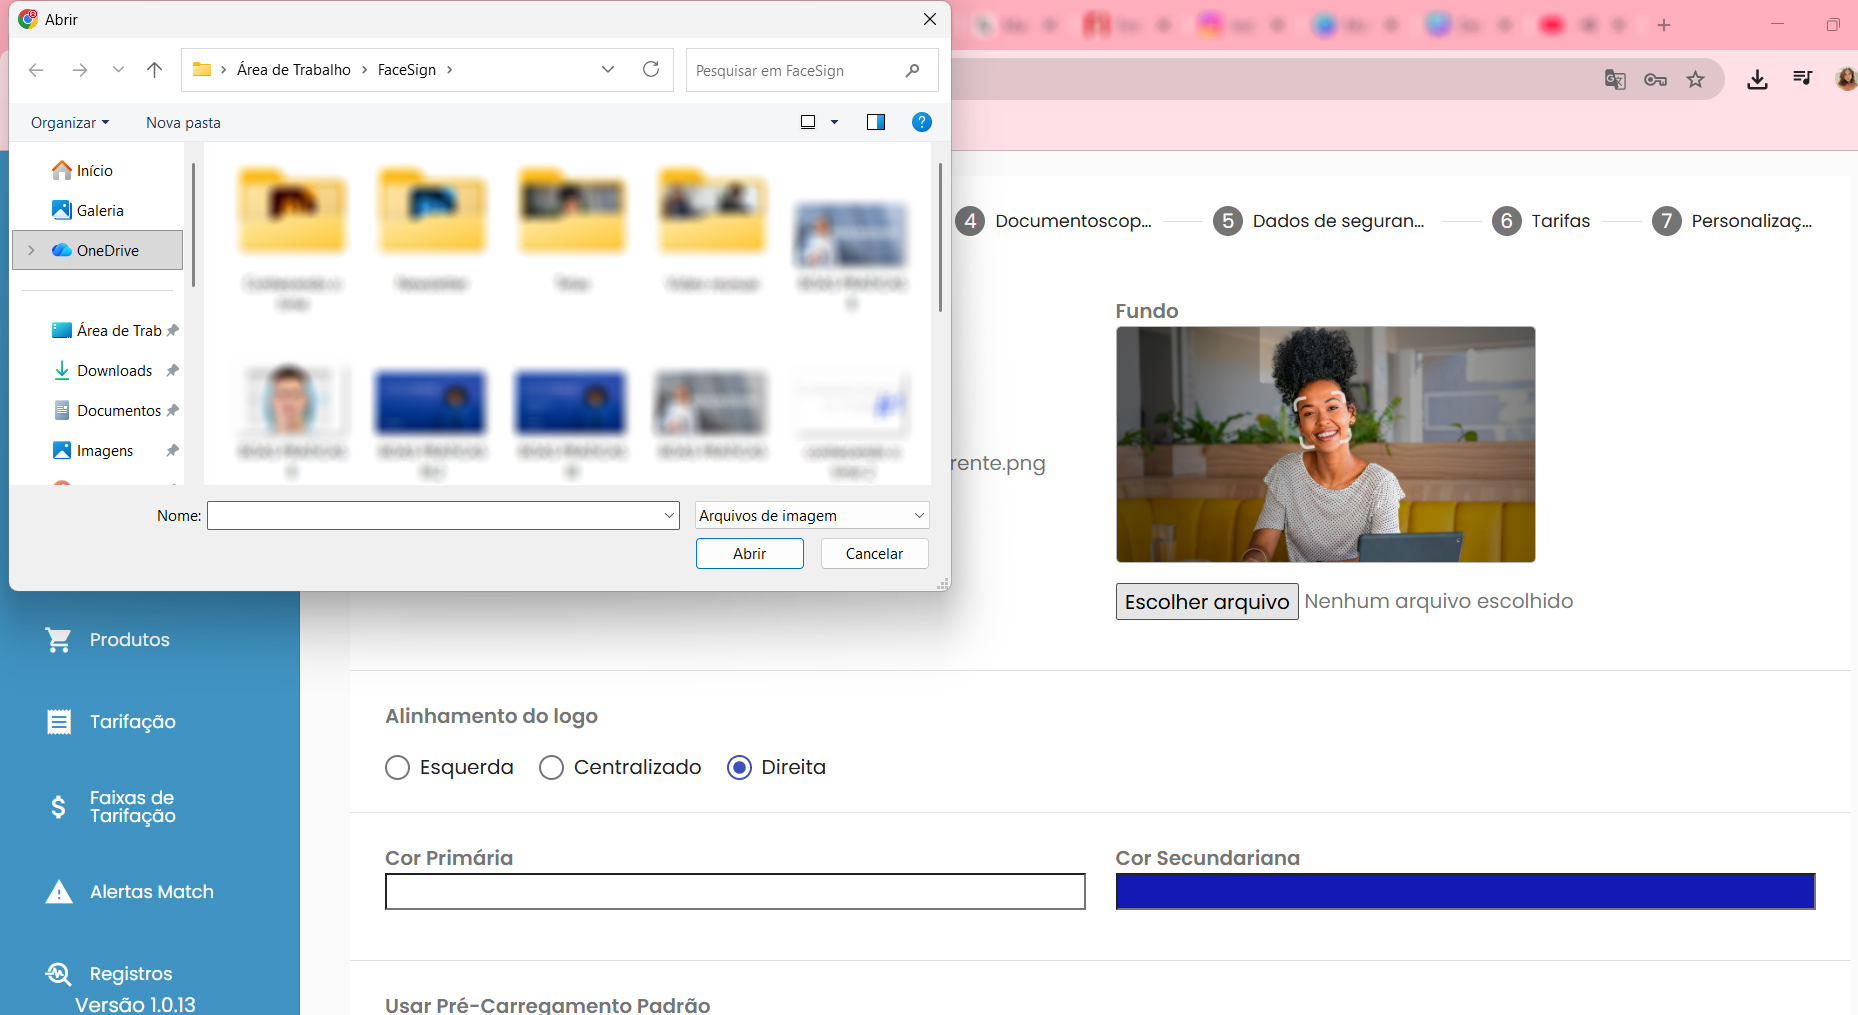
#### **Step 4:** Layout Customization
* The "**Layout**" tab allows visual customization of the client's portal. It is possible to choose a background image for the login screen by clicking "**Choose file**" in the "**Background**".
* After selection, the image is displayed as a preview.
***
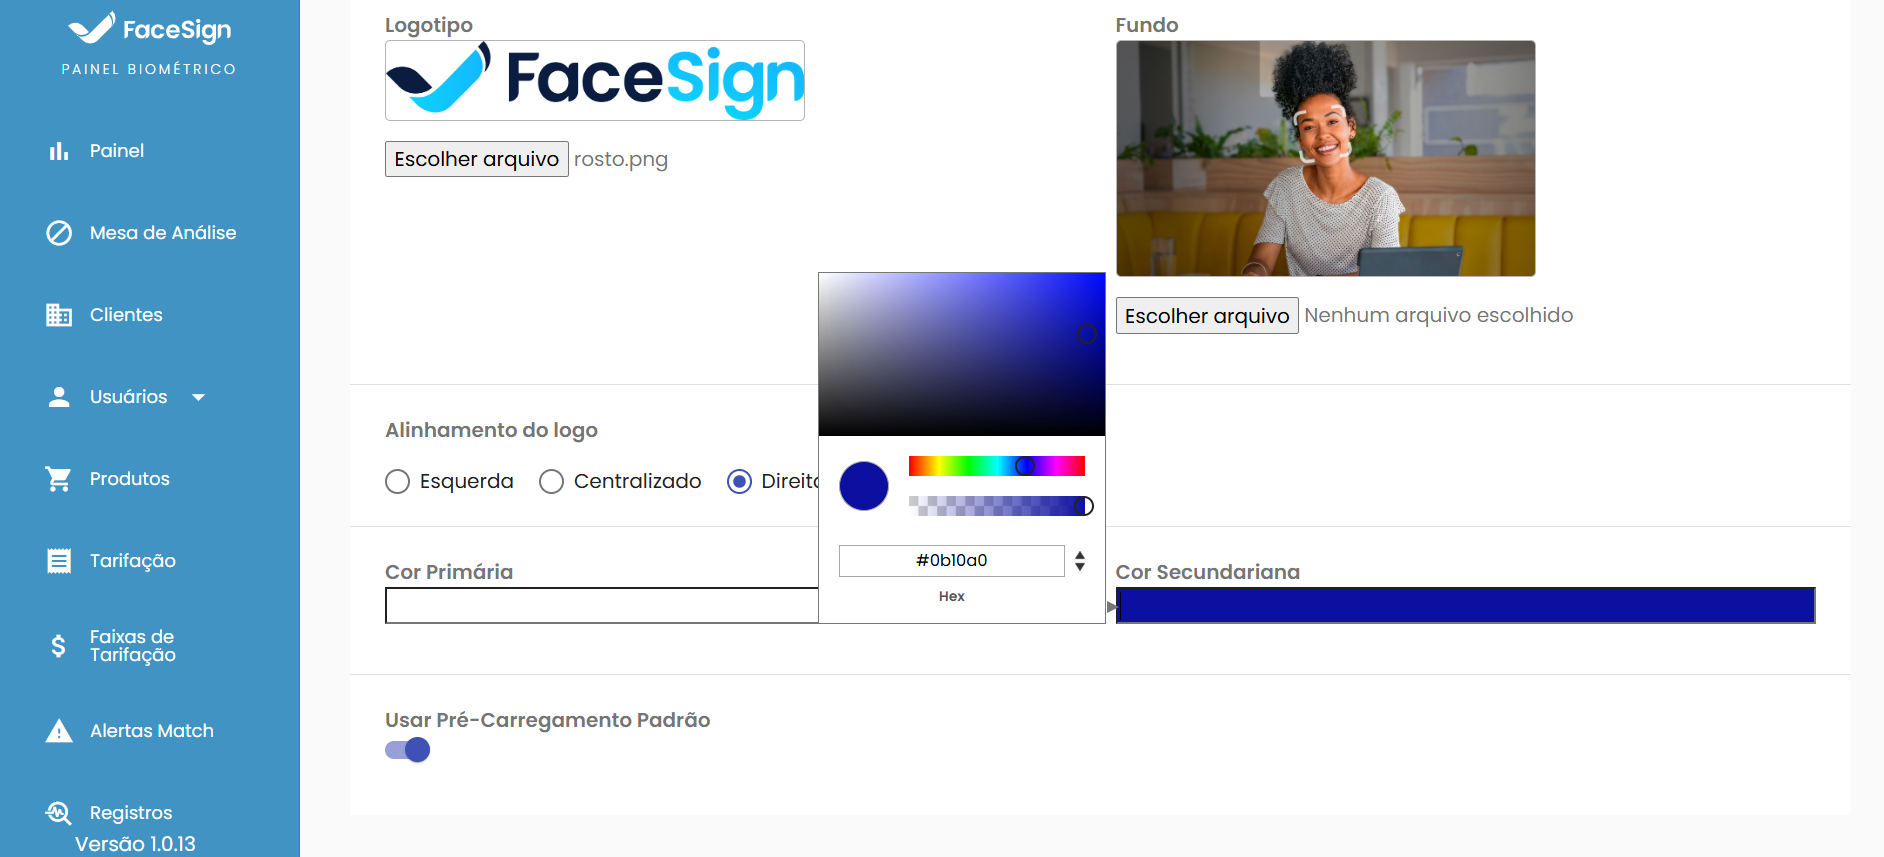
#### **Step 5:** Logo and Color Adjustment
* Still on the **customization**tab, it is possible to upload the company's logo, set its alignment (Left, Centered, Right) and customize the "**Primary Color**" and the "**Secondary Color**" of the portal. A full color picker, with palette options and hexadecimal code, is available for precise adjustment.
***
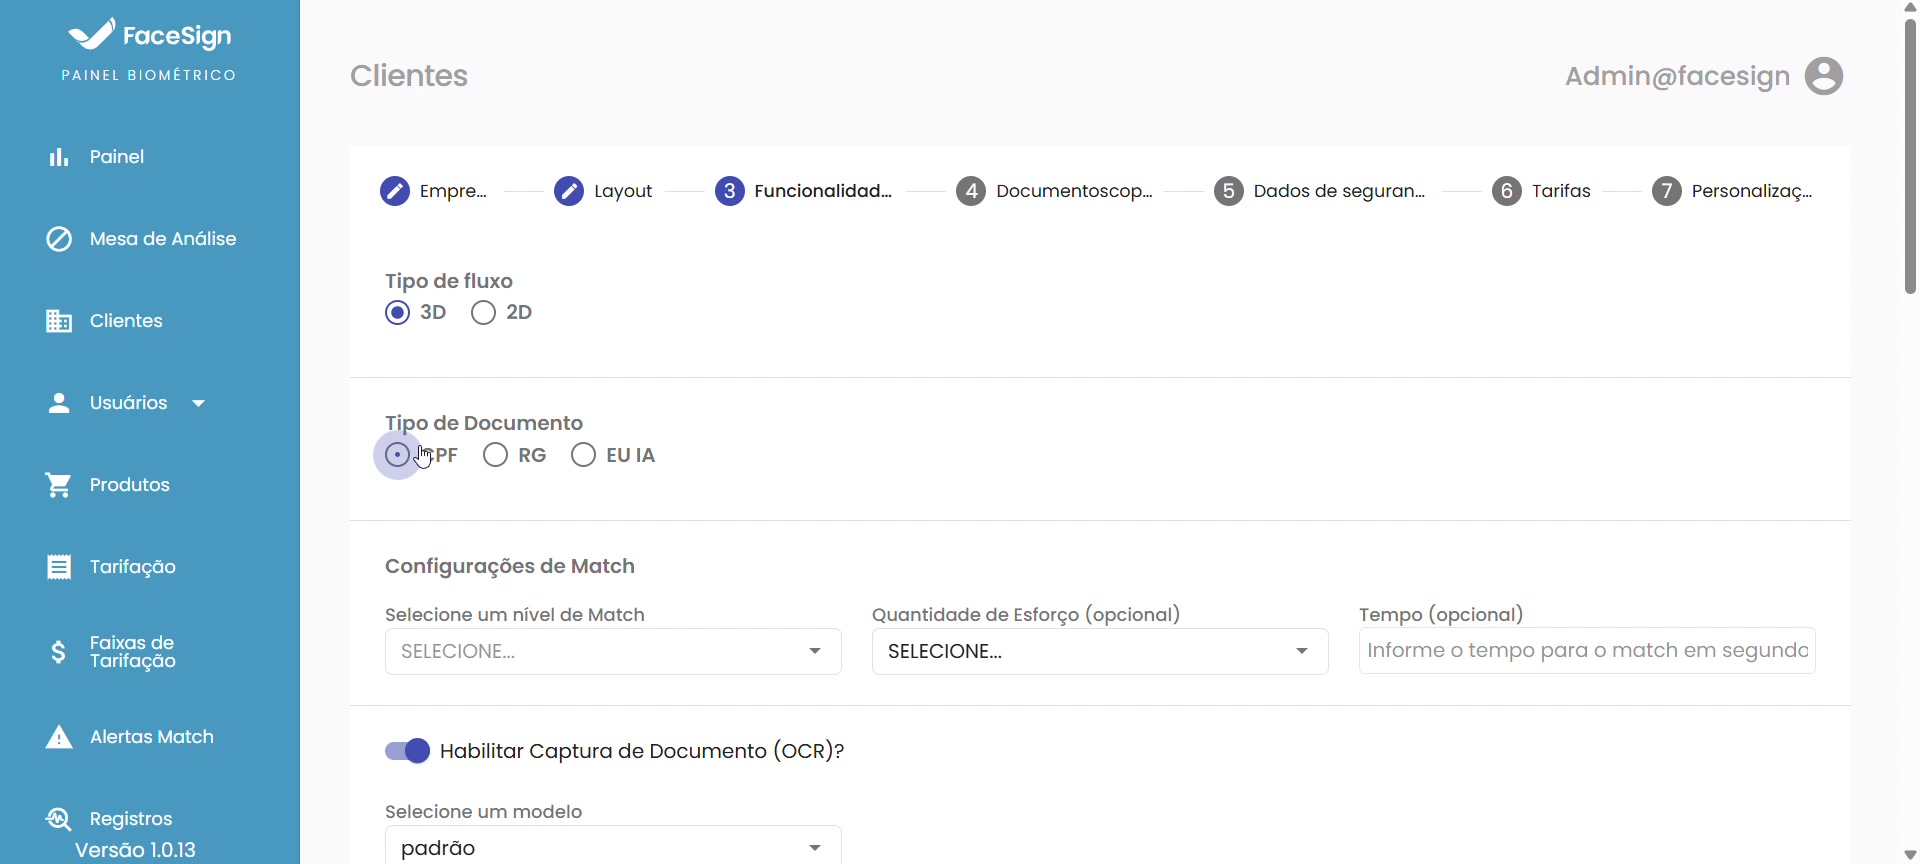
#### **Step 6:** Definition of Features
* On the "**Feature**" tab, the administrator configures the portal's behavior. It is possible to define the "**Flow Type**" (3D or 2D) and the "**Document Type**", which functions as the user's unique identifier in the biometric system (e.g., CPF, RG). In addition, the option "**Enable Document Capture (OCR)**?" activates the documentoscopy **functionality**, which not only extracts data from the physical document but also performs a security check to identify possible tampering.
***
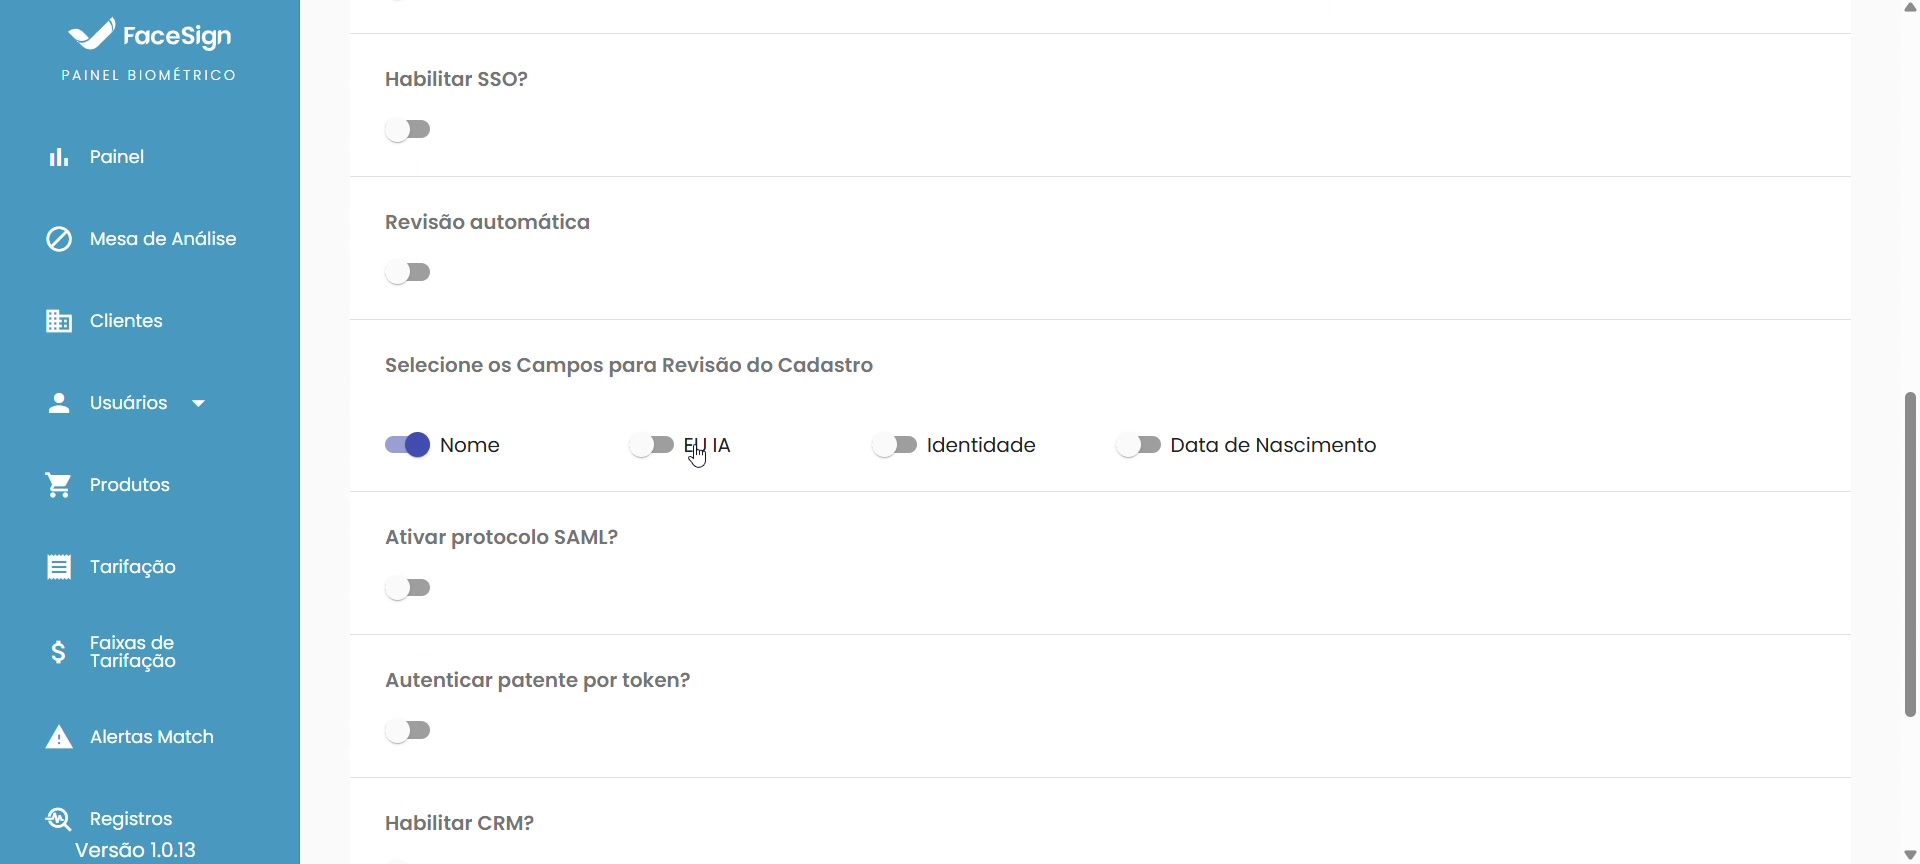
#### **Step 7:** Security and Integration Settings
* Scrolling down in the same tab, there are advanced security and integration options. It is possible to enable **SSO (Single Sign-On)**, **Automatic Review**, select fields for registration review and activate protocols such as **SAML** or token authentication, offering flexibility for different usage scenarios.
#### Step 7.1: Additional data
* The "**Additional Data**" allows the client to create custom fields to collect information specific to their business. These fields are added to the biometrics form, enabling the collection of supplementary data beyond the standard identification and documentoscopy information.
#### Step 7.2: Customization (In Deployment)
The "Customization" tab is under deployment and will soon be available in the production environment. When released, it will allow the client to:
* **Configure** the success and failure messages displayed to the user after the biometric process;
* **Define** whether to display the captured image at the end of the process;
* **Adjust** the display time of the image screen before the redirect to the destination page.
***
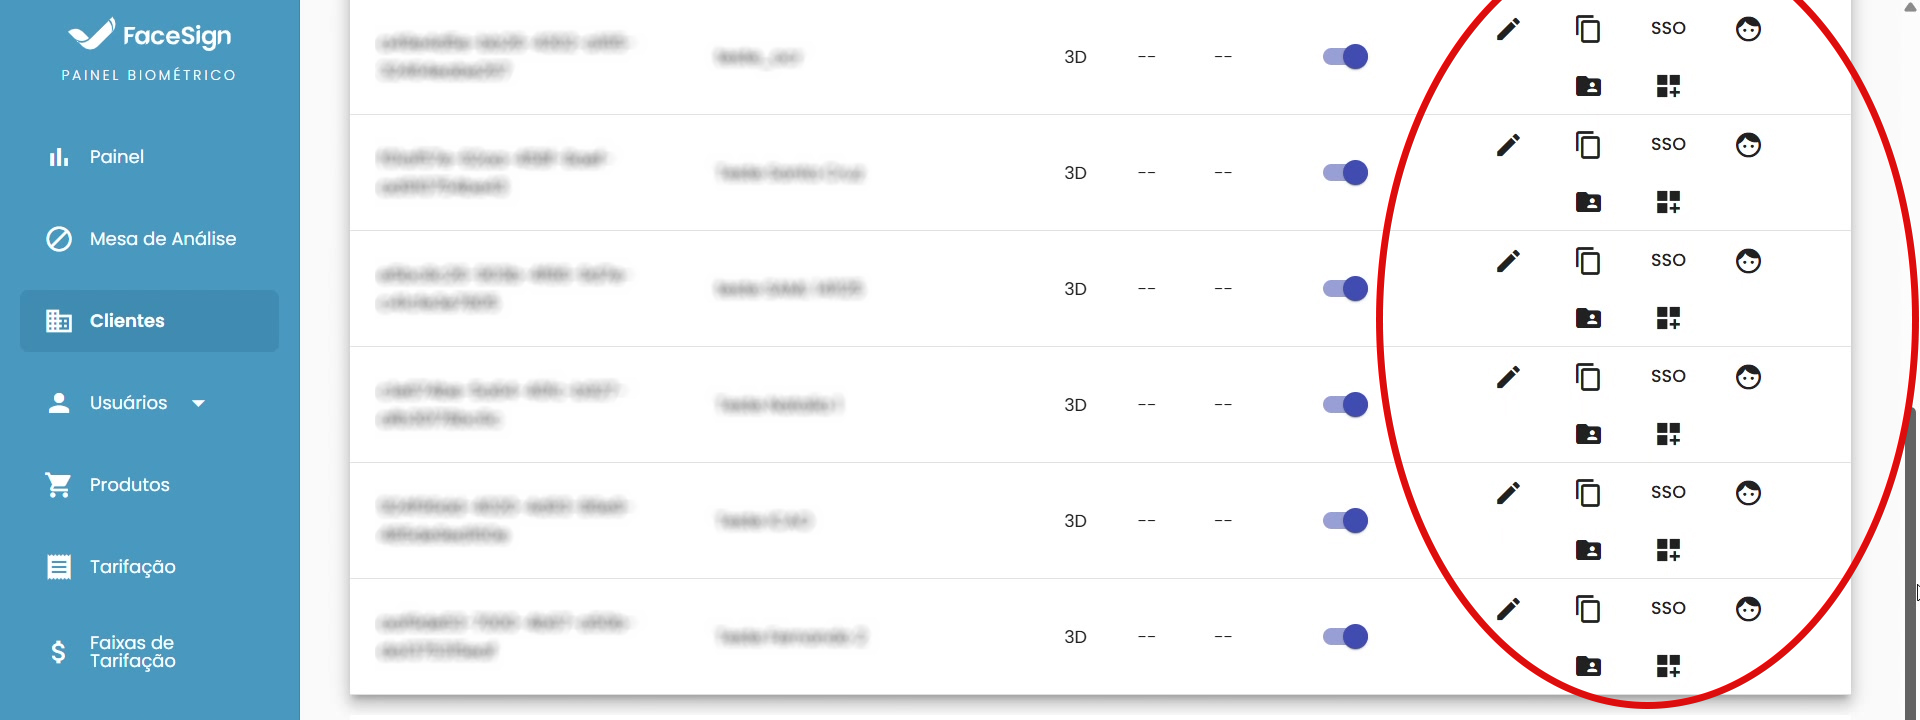
#### Step 8: Client Management
* After configuration, the new client is saved and becomes listed on the main screen of the "**Clients**" section. The interface displays a table with essential information and an "**Actions**" column with several icons for management:
| Column 1 | Column 2 | Column 3 |
| ------------------------------------------------------------------------------------------------------------------------------------------------------------------------------------------------------------------------------------------------------ | ------------------- | ---------------------------------------------------------------------------------- |
| | **Edit** | Opens the client settings screen for editing. |
| | Link "**Home**" | Performs the user's biometrics but does not generate any kind of callback. |
| | Link "**SSO**" | Performs biometrics and generates the callback for integration with other systems. |
| | Link "**Liveness**" | Performs only the "proof of life" (Liveness) verification. |
| | Link "**ID**" | Performs only documentoscopy, without associating it with a biometric user. |
| | Link "**CRM**" | Tool for real-time verification and sending biometric links. |
***
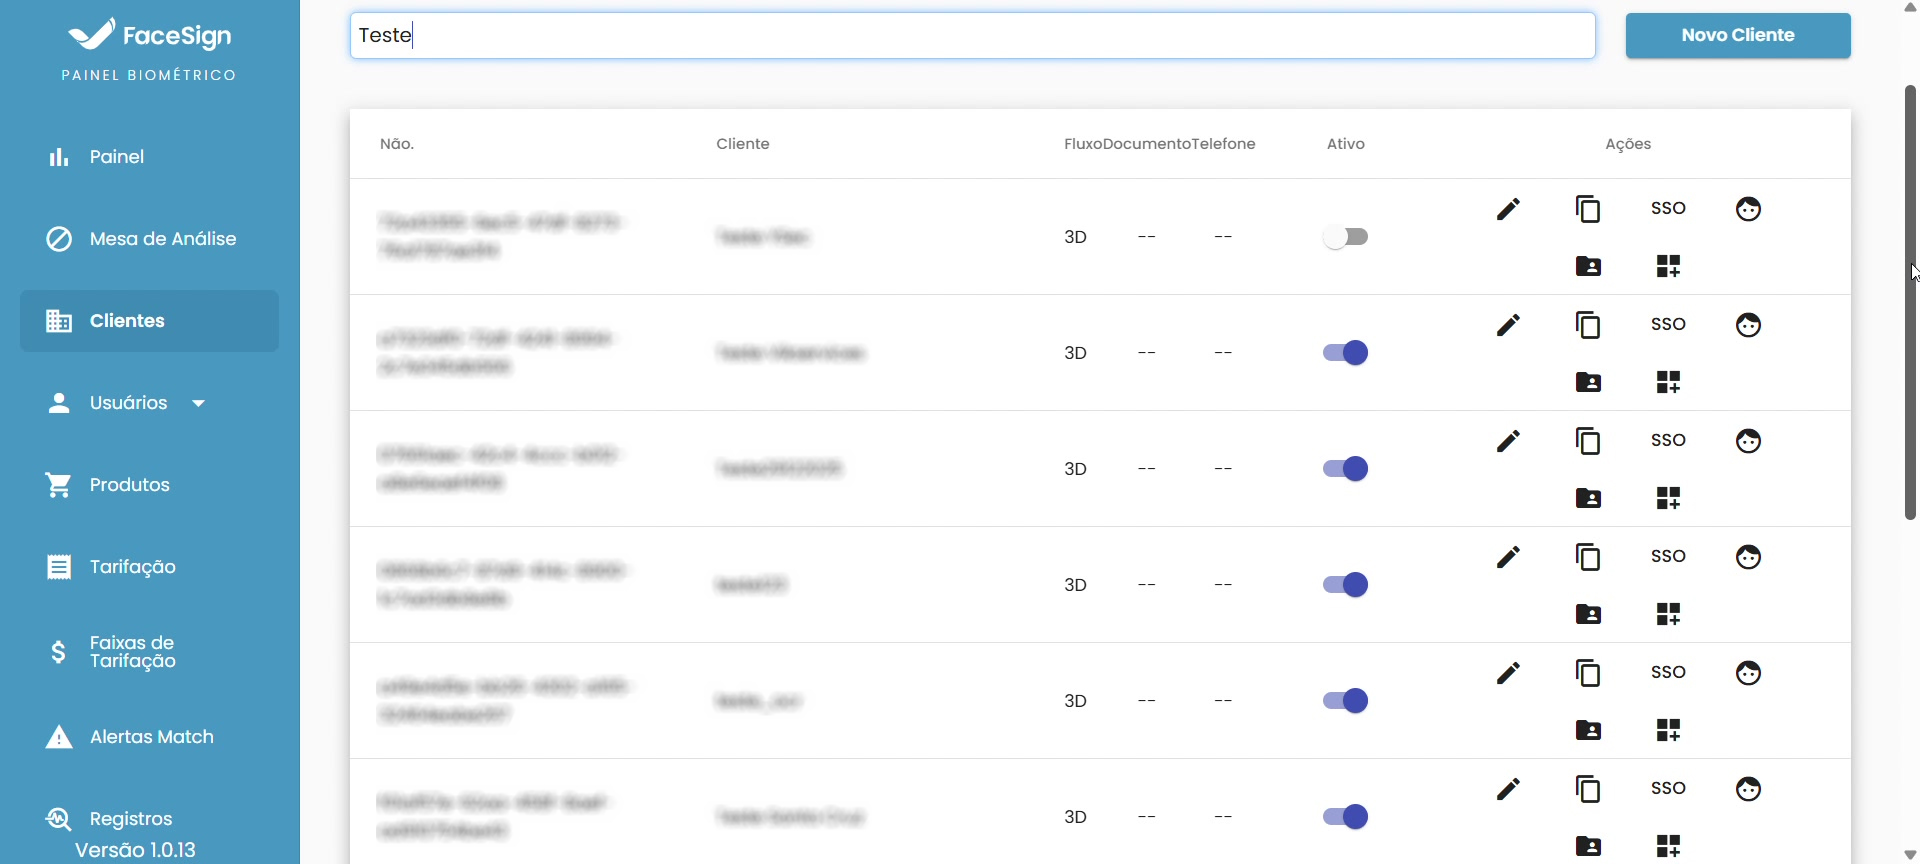
#### Step 9: Searching and Adding New Clients
* The client management interface includes a search bar to quickly locate a specific client and a "**New Client**" button to start the registration process again, demonstrating an efficient workflow for managing multiple portals.
***
#### Configuration Tabs - SUMMARY
The process of creating a client in FaceSign is organized into seven main tabs:
| Tab | Description |
| ------------------------------------------------------------ | -------------------------------------------------------------- |
|
Company
| Company data and default authentication configuration (Portal) |
|
Layout
| Visual customization with logo, colors and background image |
|
Feature
| Flow type, identifying document, OCR and security |
|
Documentoscopy
| Document verification and integration settings |
|
Security Data
| SSO, SAML and authentication settings |
|
Pricing
| Definition of plans and costs |
|
Customization
| Custom messages (in deployment) |
|
Additional Data
| Creation of custom fields for data collection |
|
Customization
| Configuration of messages and image display (in deployment) |
***
#### Conclusion
* The FaceSign platform offers a robust and intuitive administrative panel for creating and managing client portals. The configuration process is modular, divided into tabs that cover everything from visual identity to security and integration features, allowing the efficient creation of customized and secure portals.
***
### Support and Contact
For technical support or questions, use the FaceSign Admin Portal or contact our team through the official channels.

 | **Edit** | Opens the client settings screen for editing. |
|
| **Edit** | Opens the client settings screen for editing. |
|  | Link "**Home**" | Performs the user's biometrics but does not generate any kind of callback. |
|
| Link "**Home**" | Performs the user's biometrics but does not generate any kind of callback. |
|  | Link "**SSO**" | Performs biometrics and generates the callback for integration with other systems. |
|
| Link "**SSO**" | Performs biometrics and generates the callback for integration with other systems. |
|  | Link "**Liveness**" | Performs only the "proof of life" (Liveness) verification. |
|
| Link "**Liveness**" | Performs only the "proof of life" (Liveness) verification. |
|  | Link "**ID**" | Performs only documentoscopy, without associating it with a biometric user. |
|
| Link "**ID**" | Performs only documentoscopy, without associating it with a biometric user. |
|  | Link "**CRM**" | Tool for real-time verification and sending biometric links. |